Painting a Brick Fireplace
Painting a brick fireplace can be quite daunting and time consuming but it is so worth the hard work in the end. This was our fireplace when we first moved in to our house...
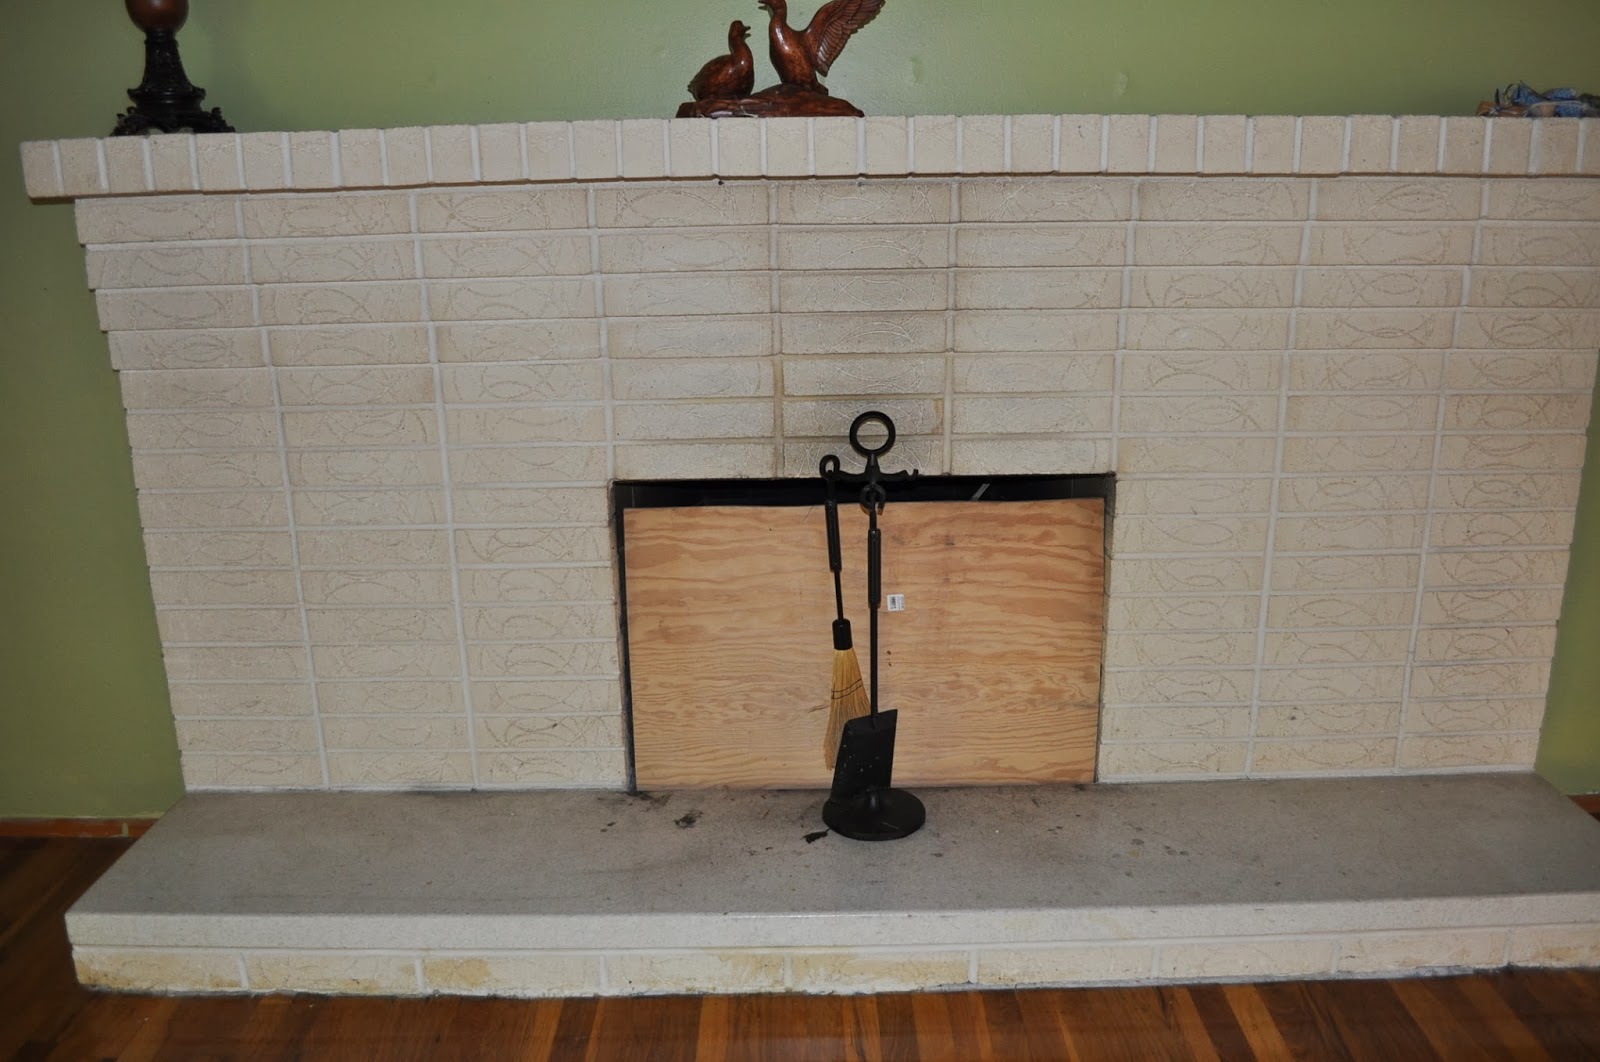 Yikes! It was all yellow-stained and just nasty to look at. The house was built in 1960 and so it has the really strange circular scoring in the brick which I was not really a fan of. I wanted to reface-it but with all the other demolition and renovation we were doing to the rest of the house, that was not a priority. So, painting was the only option. Here is a close up of the brick...

Steps:
1) Start off by taking a dry, clean rag and clean up the brick as much as possible to get any dirt or debris off so that you will have ultimate paint adhesion. I used a hand vacuum over the entire fireplace to get any small particles up.
2) I recommend painting the inside of the fireplace FIRST with the High Heat Spray Paint. That way if any black paint splatters got on the outside, the oil-based primer would be able to cover it up. I did not do this and had to do some extra touch-ups. To help prevent any splatters though, go ahead and tape off the area just outside of the interior of the fireplace with the masking paper and frog tape. Make sure to cover and tape off any part of the hearth you do not want to get paint on.
3) After prepping, begin to use the spray paint and cover the entire interior of the fireplace. Multiple coats might be needed in order to achieve an even color inside. Just follow the directions on the can.
4) The primer goes on next. Follow paint dry-time in between coats according to directions on can. This is the hardest part because a) it smells b) it takes the longest to paint as the brick soaks it right up. Be patient!
5) Next, it's time to paint your top coats of semi-gloss paint. ***You may feel that the 2 coats of primer and 1 coat of semi-gloss is sufficient for your fireplace. Since I had so many holes, cracks, and swirls in my brick, I needed all 4 coats.


Tools and Materials:
- **1 Gallon Zinsser Cover Stain, White Oil-Based Primer & Sealer [2 COATS]
- 1/2 Gallon of Paint: I choose Sherwin Williams Alabaster (a creamy white) in Semi-Gloss to match all of our trim/molding in our house [***2 COATS]
- 2 Paint Brushes: 1 for primer and 1 for paint
- Clean Wet Rag (for any spills/splatters)
- Clean Dry Rag
- Frog Tape (green color) to tape off any space you don't want paint
- **Rust-Oleum High Heat Spray Paint, Flat Black
- Brown All-Purpose Masking Paper
- Face Mask
**Due to the fact that you'll be using an oil-based paint & spray paint, take necessary precautions by using a face mask, use a fan for circulation, and/or open a window or door. It's potent stuff!
Steps:
1) Start off by taking a dry, clean rag and clean up the brick as much as possible to get any dirt or debris off so that you will have ultimate paint adhesion. I used a hand vacuum over the entire fireplace to get any small particles up.
2) I recommend painting the inside of the fireplace FIRST with the High Heat Spray Paint. That way if any black paint splatters got on the outside, the oil-based primer would be able to cover it up. I did not do this and had to do some extra touch-ups. To help prevent any splatters though, go ahead and tape off the area just outside of the interior of the fireplace with the masking paper and frog tape. Make sure to cover and tape off any part of the hearth you do not want to get paint on.
3) After prepping, begin to use the spray paint and cover the entire interior of the fireplace. Multiple coats might be needed in order to achieve an even color inside. Just follow the directions on the can.
4) The primer goes on next. Follow paint dry-time in between coats according to directions on can. This is the hardest part because a) it smells b) it takes the longest to paint as the brick soaks it right up. Be patient!
 |
| Going clockwise, the far left of the fireplace as 2 coats of primer. The upper right has zero primer. The lower right has one coat of primer. You can clearly see how 2 coats of primer helps. Also, notice the interior of the fireplace...yet to be painted. Like I said above, I wish I would have painted the interior first! |
 |
| Here is a closer look at the 3 stages of primer as described above. |
5) Next, it's time to paint your top coats of semi-gloss paint. ***You may feel that the 2 coats of primer and 1 coat of semi-gloss is sufficient for your fireplace. Since I had so many holes, cracks, and swirls in my brick, I needed all 4 coats.
The completed project...


I had to paint a fireplace for my grandfather last year, it was a lot of work, wish I had read this when I started.
ReplyDeleteYes, it definitely is so much work. We are now remodeling our basement and will be painting another fire place. Looking forward to the finished product but not the work getting there!
DeleteFinal look is great
ReplyDeleteThank you so much Michelle!
Delete