Rustic Colorblock Initials
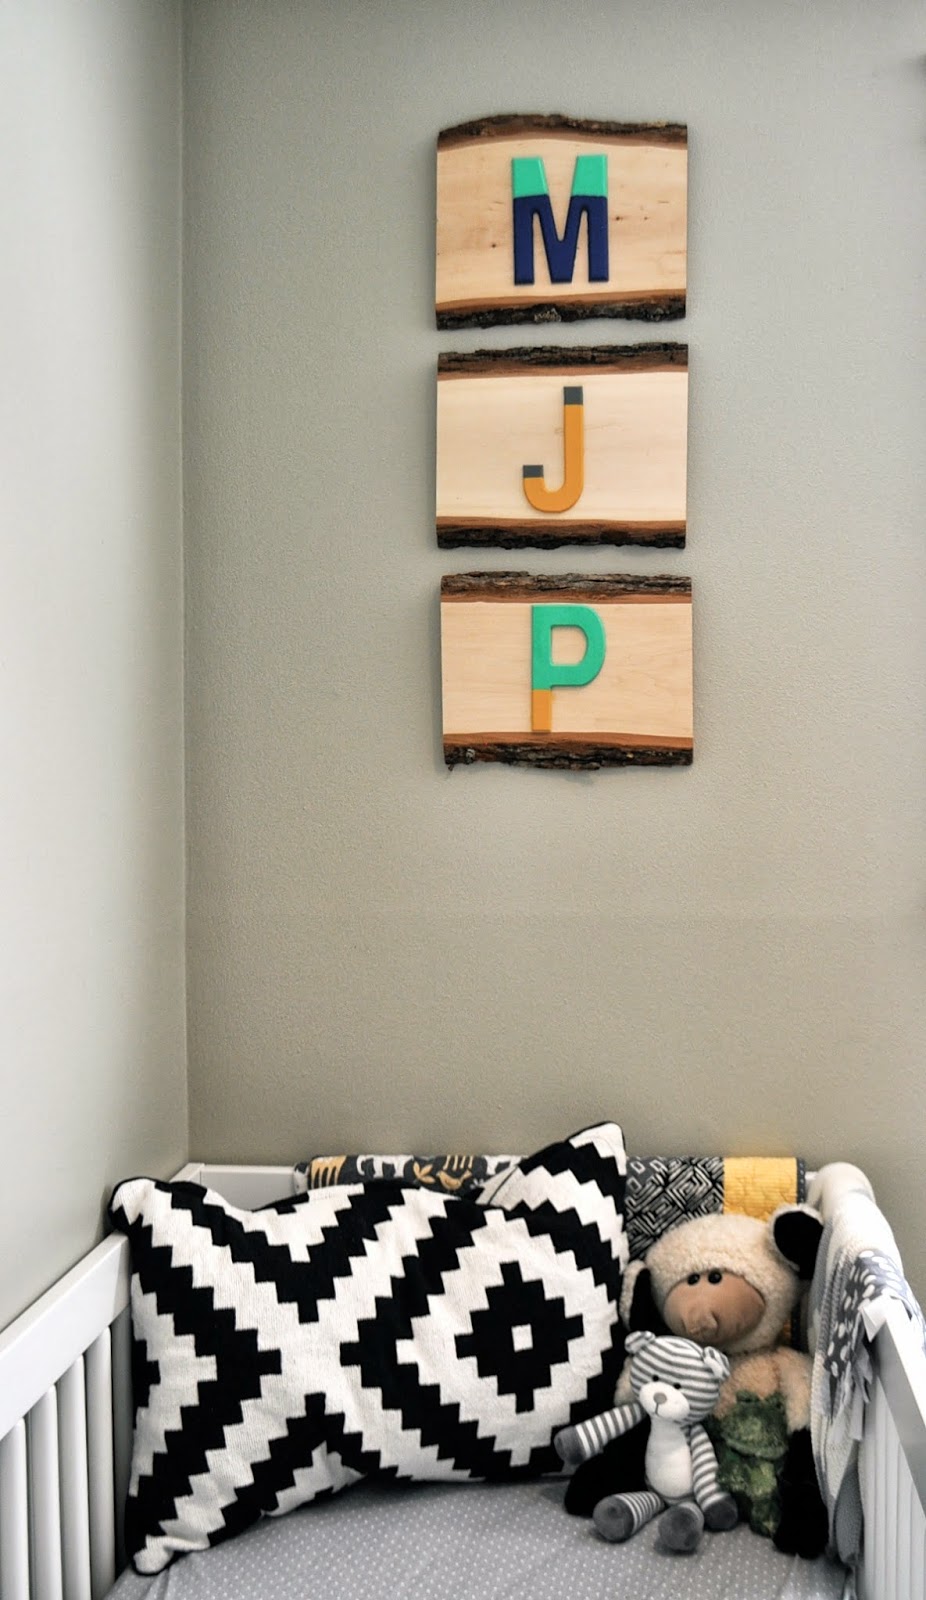
Thinking of ways to add decorations to my son's room, I wanted to incorporate his initials somewhere, somehow. I remembered seeing these natural unfinished wood plaques at a Michael's store. I also knew they had a ton of wood letters. So a plan was devised. I was going for a rustic and modern feel for his room so this project needed to also have that vibe. I opted to not go with a themed baby's room...I just wanted bright colors and patterns to mix in together with black, gray and white.
Materials Needed:
- Unfinished Wood Plaques, like this:
- Wood Glue
- Wood Letters, I chose more modern looking ones but Michael's has a lot of varieties
- Frog Tape (green)
- Sawtooth Picture Hangers (3 Medium Size)
- Nails, 3 to hang the plaques on
- Paint colors of your choice
- Small paint brush

1) For my letters, I used frog tape to tape off the area where I wanted to paint a different color, so that I could get as straight of a line as possible. I peeled off the frog tape after I did 3** coats of paint of the first color. After the first color was dry, I added new frog tape on the straight edge but on the newly painted surface. This helped to seal off any paint transfer to the first color from the 2nd color.
**You could prime the letters first...then you would probably only need 2 coats. Raw wood just soaks up so much paint, which is why I did 3 coats to achieve full coverage.

3) Once the paint has tried for your 2nd color, you are ready to glue them onto your plaques. For those perfectionists, you will want to measure the middle so that the letter can be place accordingly. I just eyed it.
4) Then determine where you'd like to hang your initial plaques. They are not super heavy, so we didn't use any anchors to hang these. We just used regular nails that we hammered in on an slight angle.


Comments
Post a Comment